
Anatomy of a Scrapbook Page

Often when somebody looks through my scrapbook they ask how long it takes to make a page. This always makes me laugh, sometimes it takes days. This always produces a stunned look on their faces, followed with why do you bother?
I bother because I enjoy it. It has also given me the chance to revisit and sort out the thousands of photos over they ears and record the story behind the picture. Nothing there that any scrapbooker would be surprised by.
I decided to photograph a page coming together. It all started with a challenge over on UK Scrappers.  On the first Thursday of every month they post a colour palette and sketch are posted, then on the third Thursday of the month a variation of the theme is posted. The idea is to rummage through your stash and adapt the challenge to suit what you find. This is perfect for me this year, I want to use as much as I can and not buy unless it is going to be used up immediately. 
In January the colours were Hot Pink, Storm Grey and chocolate brown. You can add more colours to this to complement if you wish. I am challenging myself further to try and find these colours in one of the kits that sit on my shelf. I subscribed to a kit for two years and had stacks of them that have only been stroked so far. I decided that the leftovers from one of my Sarah's Cards kits from June 2009(ish) was the nearest. This was all that was left of the kit.
 then I also found this mini page kit that I had bought eons ago
so this was thrown into the bag as well. Next step the photos, I usually start with the photos and then pick the papers, but if I want to play along with the UK Scrappers challenge I'll have to do this the other way round. I finally settled on these
Next it was on the choosing the final few photos from this pile and choosing the background card.The first was too pink
 the second the wrong shade of pink
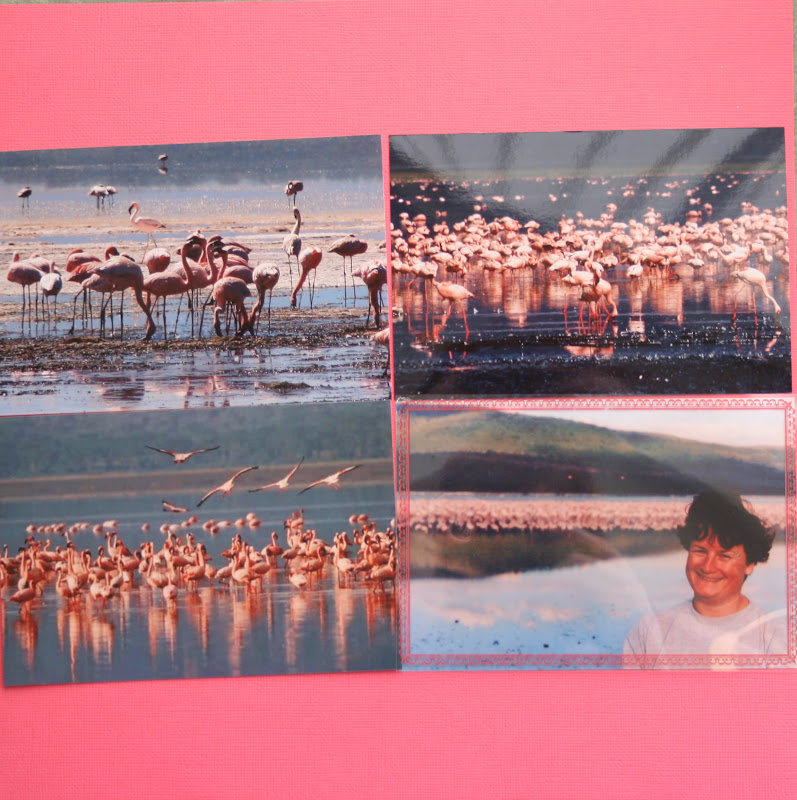
 the third one was just right and really matched the colours of the flamingos.
I now decided that 4 photos on a single page layout was too crowded so I picked another photo, pulled out the sketch for Shimelles 4x6 photo love from last May and bingo we had the basic idea.
I left this on my counter for a couple of days to make sure I still liked it. I didn't feel the need to change anything so the task of sticking down and finalising began. The end product was this
So that is why it sometimes takes me days to make a page, but the end result is worth it.

Comments

Kirsty.A said…
I can relate to this. I often have a page in my head for several days. i'll choose the cardstock when I have five mins, then mat the photos another time, maybe type and print the journalling on another day, and then finally I find an hour to stick it all together
Hi Kathy!

Just leaving you a comment to let you know I have awarded you as one of my liebster bloggers! Congrats xxxx

Popular posts from this blog

UK Scrappers Blog Hop

Welcome to the UKS Spring BlogHop! I hope you are all enjoying some lovely spring weather. You may have come to me from JimJams blog and her stunning mini book. If you lose your way, or have dropped in on me directly and want to follow the hop, you can see the full list with all the links here . ETA Remember to comment on each blog and then go back to UKS and comment there to be in with a chance of winning a £25 voucher, I am offering a vine for commetners on this blog. It is important that you include your UKScrappers name in your comment.   I have created a page with some handmade flowers, I was inspired by the beautiful Prima branches, as usual I looked at them and thought I bet I could make those. This was my first attempt and I'm pretty pleased with myself. Also on the layout you should spot a lovely voile flower, some tiny pearl flowers and a couple of blossoms made from scallop circle punches. Although the bought flowersand vines are beautiful if you need to use

End of Summer Blog Hop

Hello to all you UK Scrappers blog hoppers, hopefully you have arrived from Ifa's blog, I have been a fan of Ifa's clean scrapbooking style, how lovely is that layout.  Well the project I made is another take on what you can do with the vines I featured on the last blog hop. Often you see these things and think 'well they are lovely but what will I do with it'. Scrapbooking supplies are not just for scrapbooking.  I bought a bargain frame from a 'cheap' shop and wanted to add a bit of va va voom to it.I thought it was wood so was going to paint and crackle it,, turning it shabby and planned to give it a vintagey theme. Well that went out the window when I realised it was plastic.   Plan B then, I painted it with Gesso to give it a bit of 'tooth' so that whatever I did would grip. I followed this with a couple of coats of cream paint and sanded the edges. This was followed with a sheet of 12x12 cut down to the same size as each panel and glued

Vine Tutorial

On Monday morning I took part in the UKScrappers blog hop , who would have predicted the response to the flowers I had made for the layout. In particular the rose vine. I was flabbergasted, but promised I would let everybody know how I had done it. If anybody does make one of these vines please could you credit me and if posted in a blog I would appreciate a link back to me. I was absolutely inspired by the gorgeous Prima vines , I have purchased many but due to the cost they remain in my stash, I am too frightened to use them because they are not cheap. They fall into the category of  'waiting for a special projrect'. This made me challenge myself to see if i could make something similar.  Firstly you will need to gather your supplies Florist wires florist paper tape paper flowers - they need to have a 'tail' on them, I used these card stock to make leaves either a leaf punch or die to cut leaves, I used these distress ink   Cut as many leaves as you